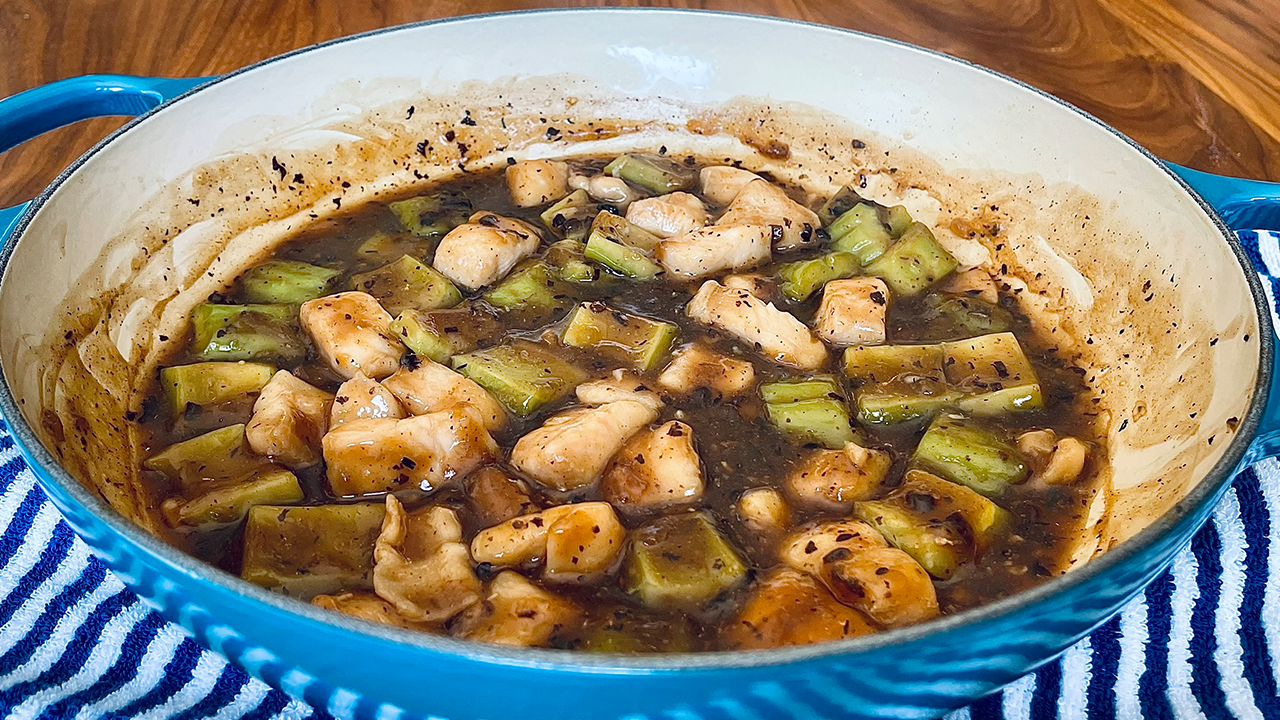
Bitter Melon with Fish and Black Bean Sauce

Blog Image - Bitter Melon with Fish.png

Simple Comfort Food

INGREDIENTS

Serves 2-4

  • 1 large bitter melon

  • 2 tbs chinese salted black beans

  • 2 cups chicken broth

  • 2 Basa Swai fish fillets (Basa Swai, Tilapia, Catfish will work)

  • 4 tbs corn starch mixed with 1/4 cup chicken broth or water

    (to thicken sauce)

  • Serve with steamed white rice

INSTRUCTIONS

Step 1: Prep Fish

Roughly slice fish fillets into 1 inch pieces. Set aside.

Step 2: Prep Bitter Melon

Cut off each end and slice melon in half lengthwise. Use a spoon to remove seeds and pith. Roughly slice melon into 1 inch pieces at an angle (watch youtube video for reference). Cutting the melon this way creates a nice mouth feel and carries the black bean sauce nicely.

Step 3: Make Black Bean Sauce

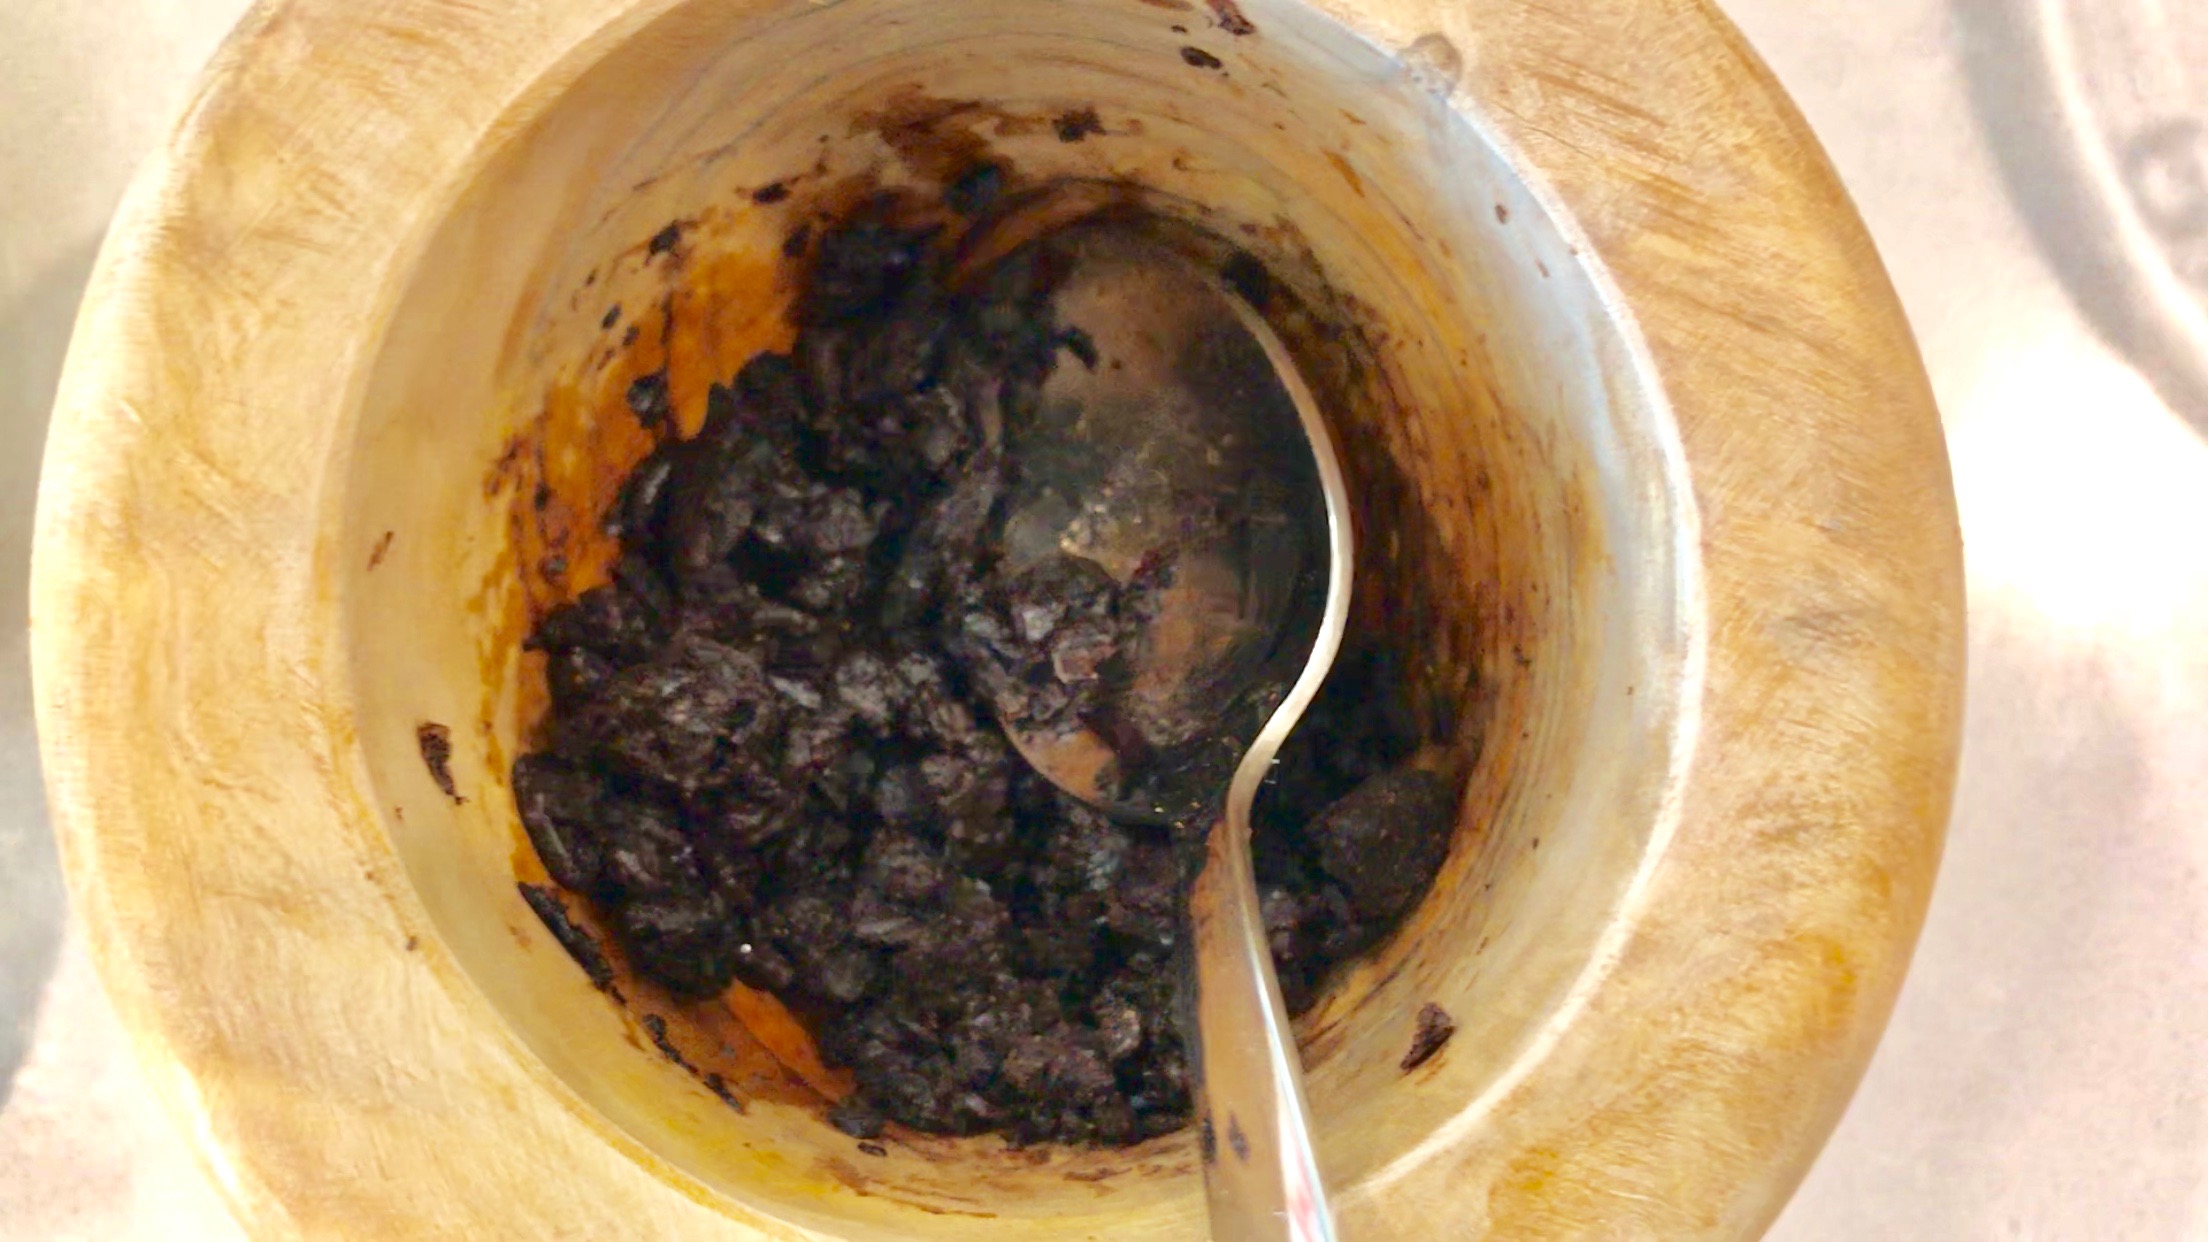
In a small bowl, stir together corn starch and 1/4 cup of chicken broth or water until fully incorporated and set aside (this will be added later to thicken the sauce). Next, roughly smash black beans in mortar and pestle or roughly smash them with the back of a spoon in a bowl. Then in a sauté pan, bring chicken broth to a boil on high heat. Next add smashed black beans and stir until evenly distributed. Let boil for 30 seconds and continue to step 4.

Step 4: Cook Bitter Melon and Fish

Add bitter melon to the sauté pan which is still at a boil. Lower to medium heat, cover and cook for 1 minute. Next, add sliced fish fillet and evenly distribute into 1 layer. Cover and cook for 2 minutes. Remove cover, stir a bit and cook until melon and fish is cooked through. (Cover helps to steam everything but if you don’t have one it will be ok).

Step 5: Thicken Sauce

Next, you may need to re-stir the corn starch slurry a bit to make sure the corn starch hasn’t settled.

While gently stirring the pan with a silicone spatula or wooden spoon, slowly pour in the slurry a little at a time to thicken the sauce to your desired thickness (after each pour, stir it a bit to incorporate well and gauge how much it thickens).

[Don’t dump slurry in all at once in one spot or you’ll have a clumpy mess]

Be careful not to mangle the fish pieces when you’re stirring the pot.

Serve with steamed white rice and enjoy!


watch the video

Easy Green Tea Tiramisu

Simple comfort food

INGREDIENTS

Makes an 8x8 dish

  • 2 cups cold heavy cream

  • 1/2 cup powdered sugar

  • 2 1/2 tbs matcha green tea powder

  • 1 1/2 tbs dark rum (optional)

  • 24 packaged ladyfingers

  • more matcha green tea powder (for dusting the top)

INSTRUCTIONS

Step 1: Prep Green Tea Mixture to Soak Ladyfingers

In a small bowl, mix 1 1/2 tbs of matcha green tea powder with 1 1/2 tbs dark rum and 1/2 cup of hot water. Whisk until thoroughly combined. Put it in the fridge to let cool (about 20 min). The cooled green tea will be used later to soak the ladyfingers.

Step 2: Prep Matcha Whipped Cream

In the bowl of an electric mixer using the whisk attachment (or a hand mixer), combine cold heavy cream, powdered sugar and 1 tbs green tea powder. Mix on medium speed until it forms firm peaks and has a thick cream consistency.

Step 3: Assemble the Cake

Assemble the cake in an 8x8 inch glass dish. Dip each lady finger into the bowl of cooled green tea and rum mixture for only 5 seconds and place each piece onto the bottom of the pan. Holding cookies in longer than 5 seconds can cause them to fall apart. Cut cookies if needed to fit the bottom.

Next, spread 1/2 of the matcha whipped cream evenly over the lady fingers. Then arrange a second layer of soaked lady fingers and top with the remaining matcha whipped cream. Smooth the top, cover and refrigerate for at least 4 hours to let the ladyfingers soften and absorb the green tea flavor, preferably overnight.

When ready to serve, dust with Matcha green tea powder over the top for garnish.

Serve and enjoy!


WATCH THE VIDEO

Miso Glazed Salmon

Blog Image - Miso Glazed Salmon.png

Quick, easy and delicious!

INGREDIENTS

Makes 2-4 Fillets

  • 1/4 cup brown sugar

  • 2 tbs soy sauce

  • 2 tbs hot water

  • 2 tbs miso paste

  • 2-4 (6oz) salmon fillets (about 1 inch thick)

  • 1/4 cup green onions (thinly sliced or chopped)

INSTRUCTIONS

Step 1: Marinate Salmon

In a large bowl, stir together the brown sugar, soy sauce, hot water and miso paste until thoroughly combined. Place salmon in the bowl and cover fillets with marinade. Cover and let marinate for 30 minutes.

Step 2: Broil Salmon

When placing the salmon on the foil lined baking sheet, be careful not to get marinade all over the pan or it will burn and smoke while broiling. If you drop any marinade, wipe it up clean so only the fish has marinade on it.

Be careful not to get marinade all over the pan or it will burn and smoke while broiling.

Place salmon on a foil lined baking sheet in the center of the oven. It needs to be on the center rack so the marinade does not burn too quickly. The fillets should be coated with the marinade but not have any excess puddling of it on the top of the fish. As the marinade can burn easily, remove any excess puddles of marinade.

It needs to be on the center rack so the marinade does not burn too quickly.

Broil at 500 degrees F for 8 minutes or until cooked through.

Once salmon is done cooking, immediately remove from the oven and transfer fillets to a plate. Garnish with green onions.

Serve with steamed white rice and enjoy!
 

WATCH THE VIDEO

Simple Mo Gua (Fuzzy Melon) Soup

Blog Image - Mo Gua Soup.png

Warm, soothing, delicious

INGREDIENTS

Serves 4-5

  • 6 cups chicken broth

  • 8 dry black mushrooms

  • 1 medium Mo Gua melon (Fuzzy Melon)

  • 2 cups warm water (for soaking mushrooms)

INSTRUCTIONS

Step 1: Soak Mushrooms

Soak mushrooms in 2 cups of warm water for 1 hour or until fully softened. Do not throw away the water. 

As the mushrooms soak, they will flavor the water. Save water to add in soup later. Remove stem and slice mushrooms into small slices once they have softened.

Step 2: Prep Mo Gua Melon

Peel the melon with a vegetable peeler. Roughly slice into half moon shapes about 1/4-1/2 inch thick or to preferred shape that is not too thick.

Step 3: Boil Soup

Bring chicken broth to a boil. Add mushroom flavored water to the pot and reduce heat so that the soup is at a low boil. Add mushrooms and melon to the pot and cook at a low boil for 10-20 minutes until the melon is cooked to your desired doneness. I do mine for about 15 minutes.

Enjoy!


Watch the video


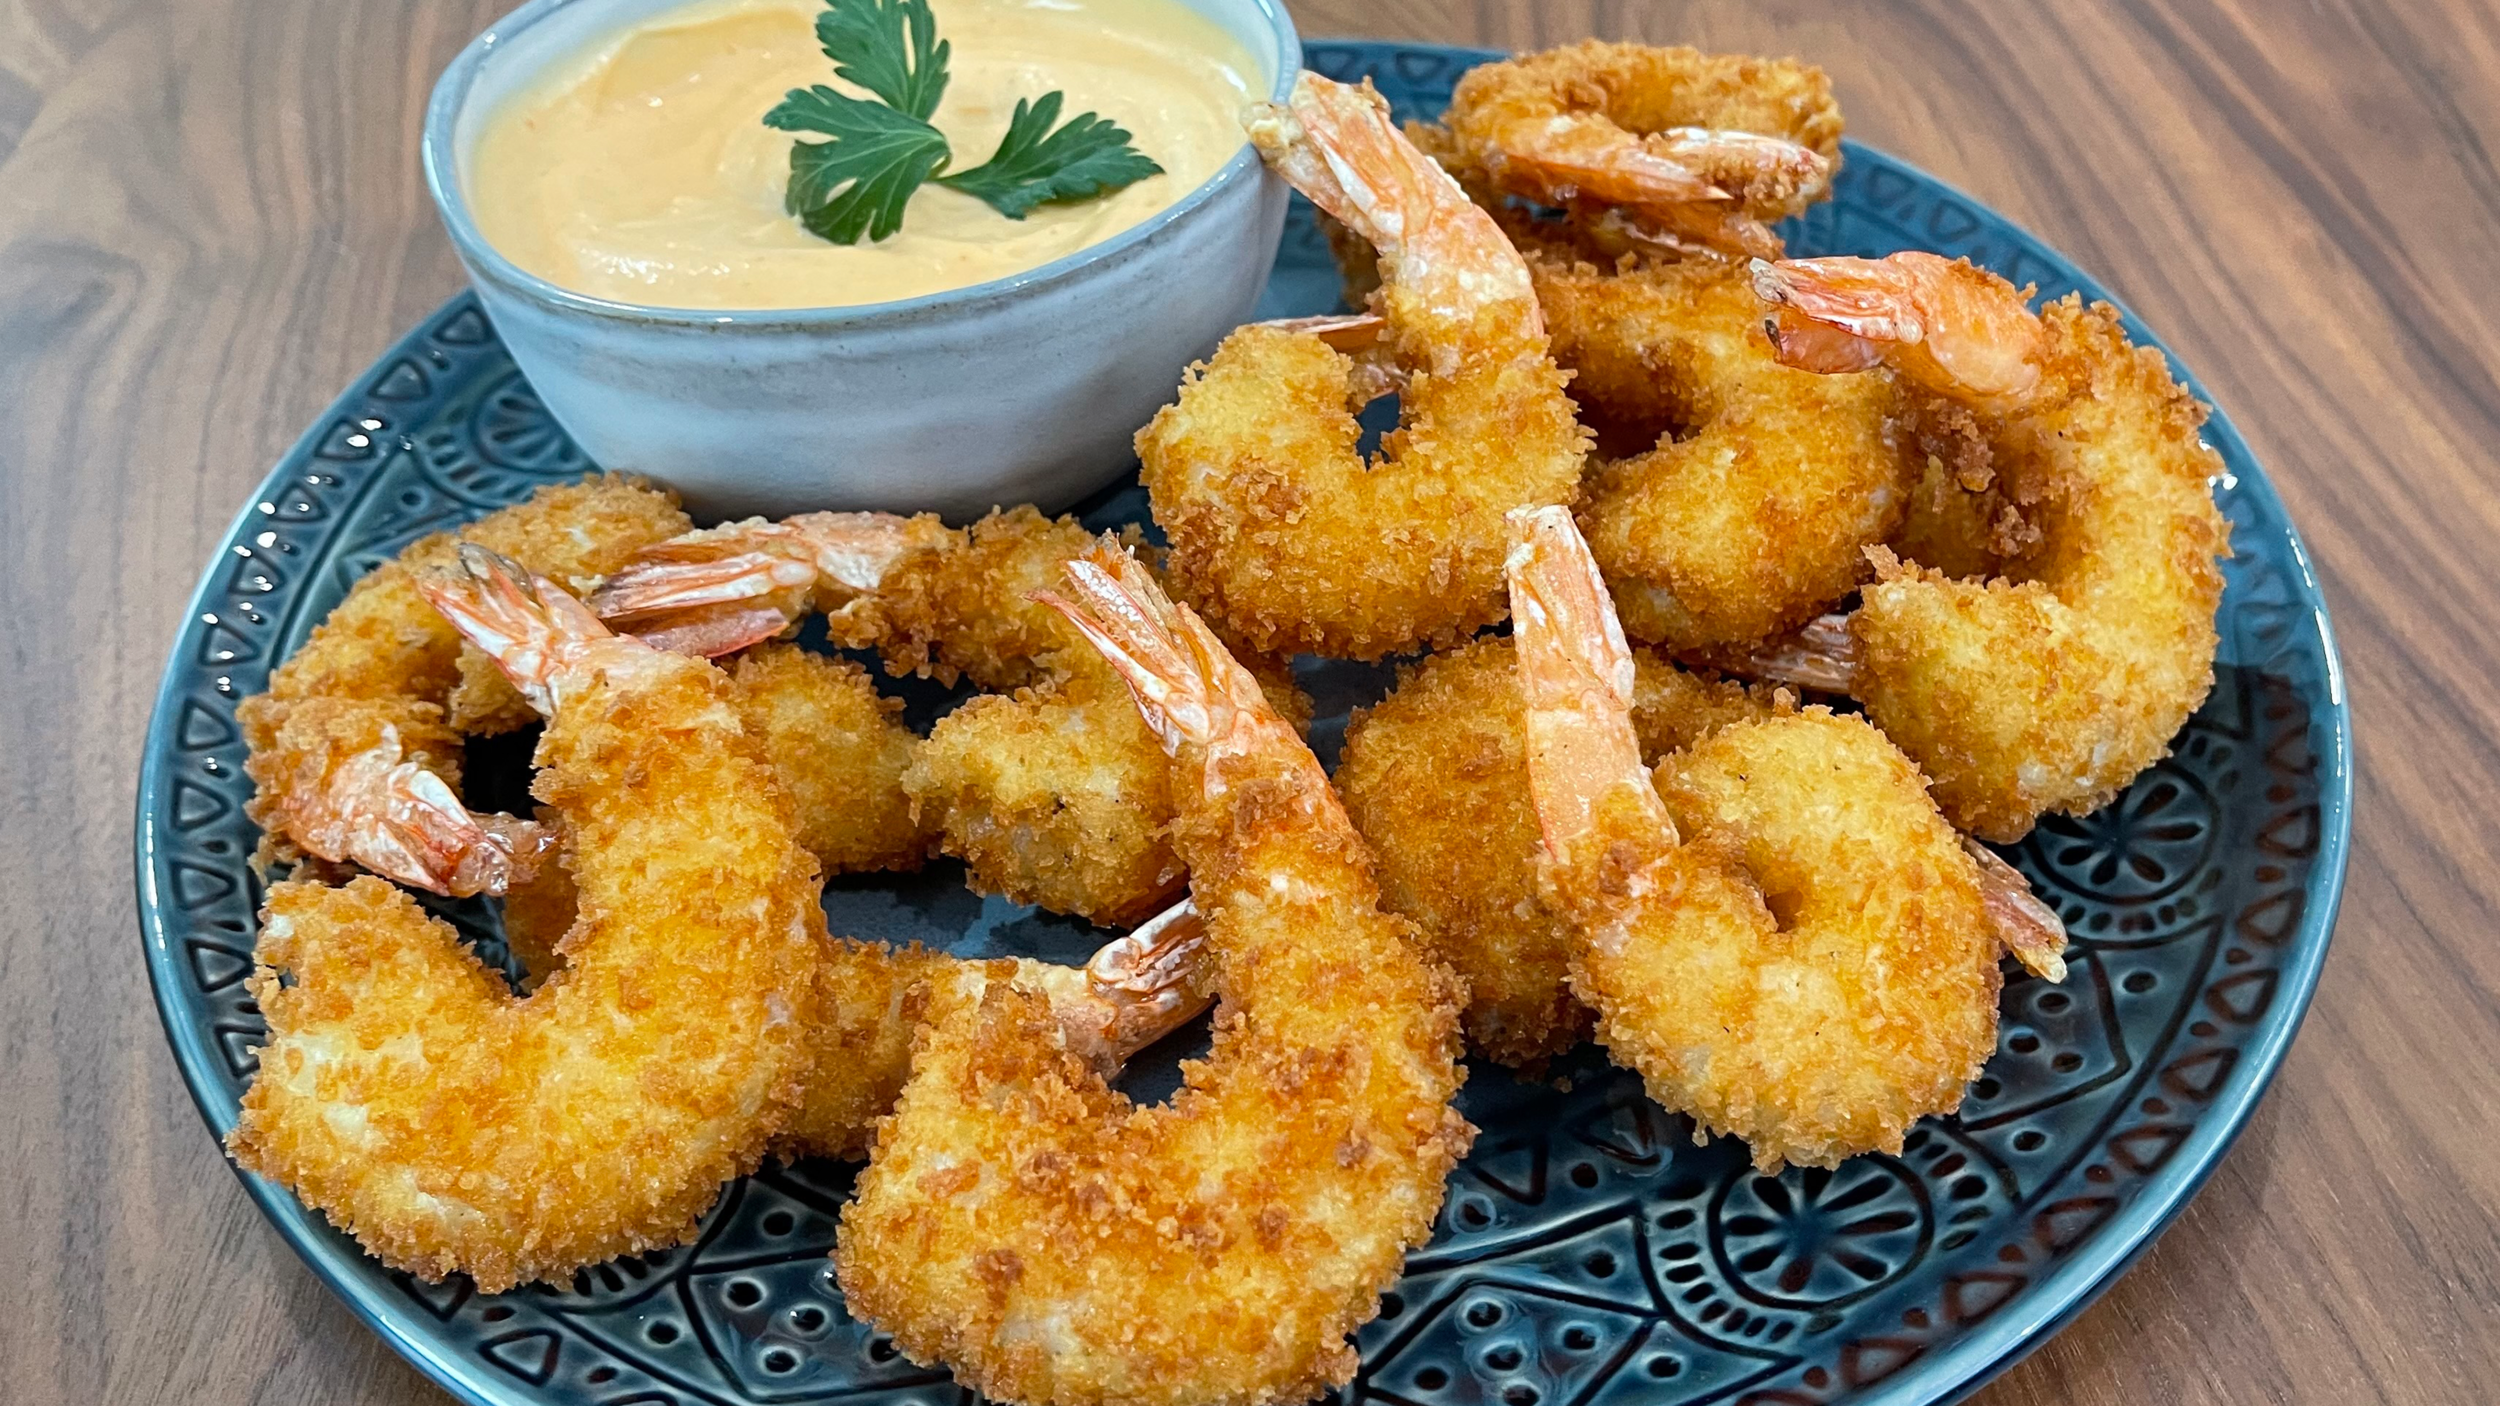
Panko Fried Shrimp with Sriracha Mayo

Blog Image - Panko Fried Shrimp.png

Crispy and Delicious!

INGREDIENTS

Makes 16-20 pieces

Sriracha Mayo

  • Sriracha sauce (amount to taste)

  • 1 cup mayo

  • parsley for garnish (optional)

Fried Shrimp

  • 1/2 cup all-purpose flour

  • 1/2 cup corn starch

  • 2 eggs

  • 1-2 cups Panko breadcrumbs

  • vegetable oil, for deep frying

  • 1 pound large peeled and deveined shrimp (16-20 count)

  • kosher salt

  • black pepper

INSTRUCTIONS

Step 1: Prep Sriracha Mayo

Stir 1 to 3 tbs of Sriracha sauce into the mayo. Adjust to your own taste. Refrigerate until ready to use.

Step 2: Prep the Shrimp

Pat shrimp dry and sprinkle with one light layer of Kosher salt and pepper. Toss shrimp so all the pieces are coated.

Step 3: Coat Shrimp with Panko Breadcrumbs

Thoroughly mix flour and cornstarch in a shallow bowl. Beat eggs in a second bowl. Add Panko to a third bowl. Holding the tail, dredge each shrimp in the flour/cornstarch mixture to coat the whole shrimp except the tail. Then dip whole shrimp including tail into the beaten egg and finally coat with the Panko breadcrumbs. Press Panko on the shrimp to make sure they adhere to the shrimp.

Step 4: Deep fry Shrimp

Fill a medium pot half way with oil and heat to 320-350 degrees. Use a cooking thermometer to check temperature.

Don’t have a thermometer?

Drop a piece of Panko in the oil. If it sizzles and floats to the top, your oil should be ready.

Deep fry 4-5 pieces for about 1 minute or until cooked through. Continue to do them in batches of 4-5 so you don’t overcrowd the pot which will drop the oil temperature. If doing a larger quantity, consider using a larger pot.

Place cooked shrimp on a plate with a paper towel to absorb the excess oil while you cook the rest. If you wish, try a bite and decide if you would like to sprinkle the rest with some Kosher salt.

Serve with Sriracha Mayo and enjoy!


Watch the video


Chicken with Black Bean Sauce

img_chicken_with_black_bean_sauce.jpg

INGREDIENTS

4 Servings

  • 3 regular or large chicken breasts

  • 2 tbs salted black beans from chinese grocery store - example

  • 1/4 cup brandy

  • 2 cups chicken broth (Swanson brand is preferred)

  • 1/4 cup black or dark soy sauce (Do not substitute with regular soy sauce or dish will be bland and have different flavor)

  • 1/4 cup dry sherry wine

  • 5 slices of ginger

  • 3 garlic cloves

  • 1 medium yellow onion

  • 1 yellow bell pepper

  • 1 red bell pepper

  • 1 good size bundle of asparagus

  • cornstarch

  • olive oil

INSTRUCTIONS

Step 1: Prepare the chicken

  1. Smash 3 cloves of garlic with knife

  2. Matchstick the 5 slices of ginger

  3. In a bowl, add smashed garlic, matchstick ginger, brandy, and black soy sauce - set aside

  4. Cut chicken breast into bite size pieces and place pieces in the marinade

  5. Add 1/2 a tbs of cornstarch to the marinade

  6. Mix chicken in marinade well so it is all coated

  7. Marinate the chicken for 30 minutes

Step 2: Prepare salted black beans

IMG_9920.JPG
  1. In a small bowl, smash black beans with the back of a spoon into a thick paste or use a mortar and pestle. It is ok if not all the beans are smashed but they should be mostly smashed.

  2. Mix in a dash of black soy sauce and set aside to use later.
     

Step 3: Cut vegetables

  1. Slice bell peppers into 1-2 inch skinny slices

  2. Cut asparagus into bite size pieces about 1-2 inches long (remove tough ends first)

  3. Slice onion into thin pieces about 1 inch wide

Step 4: Make cornstarch mixture

  1. In a small bowl, mix together 4 tbs of cornstarch with 1/4 cup of water

  2. Set aside

Step 5: Cook chicken

  1. Preheat large pan or wok to medium high or high heat depending on your stove (Takes about 2:30-3 minutes). Needs to be hot enough so that it sizzles when you add in chicken. 

  2. Mix 2 tbs of olive oil into the chicken and dump entire bowl of chicken and marinade into the pan.

  3. Stir fry for 4 minutes stirring constantly. Set a timer so you don't overcook it or it will be dry. Chicken will also continue to cook later when added to the sauce later on.

  4. Take off heat and set aside

Step 6: Cook vegetables and finish dish

1. Make sure pan is hot like when doing the chicken.

2. Mix 2 tbs of olive oil into the vegetables and dump entire bowl into hot pan.

3. Stir fry for 4 minutes stirring constantly.

4. Add in sherry wine, black beans, chicken broth, and cooked chicken - stir

5. Bring to boil

6. Once boiling, give cornstarch mixture a final stir to make sure it is all smooth and add it to the pan pouring it evenly so it is not concentrated in one spot.

7. Quickly mix everything well and let sauce thicken which only takes 1-3 minutes

8. Cut into a piece of chicken to make sure it is cooked through

9. Take off heat and enjoy

Cajun Broiled Salmon with Caesar Salad

cajun-broiled-salmon.jpg

Cooks in 8 minutes!

INGREDIENTS

Serves 2

Cajun Broiled Salmon

  • Olive oil

  • Your favorite store bought cajun seasoning

  • 2 6-8oz salmon fillets

Caesar Salad

  • Either romaine, arugula, or baby kale lettuce

  • Your favorite store bought caesar dressing

  • 1 avocado

  • 2 red radishes

  • Shredded Parmesan cheese

INSTRUCTIONS

Step 1: Broil the Salmon

  1. Preheat the broiler.

  2. Line a heavy rimmed baking sheet with foil.

  3. Arrange the salmon fillets on the baking sheet.

  4. Lightly coat both sides with olive oil.

  5. Season both sides with the cajun seasoning. 

  6. Broil the salmon for 8 minutes exactly with the rack 5-6 inches away from the broiler.

  7. While salmon is cooking, do step 2 - make the Caesar Salad

  8. When time is up, immediately transfer the fillets to the salad.

  9. Sprinkle with shredded Parmesan cheese

Step 2: Make the Caesar Salad

  1. Use a plate to measure out how much salad you need and put it in a large bowl.

  2. Add the dressing and toss until lettuce is lightly coated.

  3. Plate the salad.

  4. Add chopped avocado and red radishes or whatever you have on hand.


Crispy Peruvian Chicken

crispy-peruvian-chicken-blog.jpg

Crispy, zesty... delicious!

INGREDIENTS

Serves 4

Cilantro Lime Dipping Sauce

  • 1/2 cup of mayo
  • 1 cup fresh cilantro
  • 3 cloves of garlic
  • 1 chopped bell pepper
  • 1/4 cup of sour cream
  • 1 tbs fresh lime juice
  • 1/4 tsp black pepper
  • 1/2 tsp Kosher salt (Do not substitute or will be too salty with regular salt)

Crispy Peruvian Chicken

  • 8 bone-in, skin-on chicken thighs (organic, free-range)
  • 2 cups panko (Japanese bread crumbs)
  • 1 tbs cumin
  • 2 tsp Kosher salt (Do not substitute or will be too salty with regular salt) 
  • 2 tsp sugar
  • 1 tsp pepper
  • 2 tsp paprika
  • 1 tsp oregano
  • 4 tbs olive oil
  • 1 tbs grated Lime zest
  • 1/2 cup dry white wine
  • 1/2 cup dijon mustard

INSTRUCTIONS

Step 1: Make the Cilantro Lime Dipping Sauce

  1. In a blender or food processor, add in the mayo, sour cream, cilantro, bell pepper, garlic, lime juice, salt and pepper and blend until smooth.
  2. Once it is smooth, drizzle in the olive oil and blend more until it is incorporated. You can refrigerate the sauce until it is ready to use.

Step 2: Make the Chicken

  1. Preheat the oven to 350 degrees.
  2. In a large bowl, whisk together the panko, cumin, salt, sugar, oregano, paprika, olive oil and lime zest. Make sure to break up any clumps of seasonings and mix well.
  3. In another large bowl, whisk together the mustard and wine.
  4. Cut off the excess skin from the chicken and pat dry with paper towels. Sprinkle generously all over with salt and pepper.
  5. Dip each piece in the mustard mixture on both sides, and then place skin-side down only into the crumb mixture, pressing gently to make the crumbs adhere. Place the chicken on a sheet pan crumb-side up.
  6. Use a spoon to add more crumbs to missed spots on the chicken and use the back of the spoon to press the crust in place.
  7. Bake the chicken for 40 minutes.
  8. Raise the heat to 400 degrees and bake for another 10 minutes to help brown the crust.
  9. Serve hot, warm, or at room temperature.


Chicken Donburi

Hearty and easy!

INGREDIENTS

Serves 4

  • 5 boneless skinless chicken thighs
  • 2 slices of ginger
  • 1 yellow onion (sliced into 1-2 inch pieces)
  • 1 cup chopped green onions (use more depending on preference)
  • 5 eggs lightly beaten (don't over mix so you get a combination of soft yellow and white eggs)
  • 2 cups chicken broth/stock
  • 1/2 cup soy sauce
  • 1/2 cup sugar
  • vegetable oil

INSTRUCTIONS

Step 1: Cook the chicken and eggs

  1. Coat the bottom of a saute pan with vegetable oil and heat on medium-high
  2. Saute ginger, chicken, and yellow onions for about 5 minutes until chicken is browned and mostly cooked through. Chicken will still have time to cook when sauce boils.
  3. Once chicken is cooked, add in chicken broth, sugar, and soy sauce and stir
  4. When it starts to boil, lower heat and add green onions
  5. Pour lightly beaten eggs all over chicken and cover until egg is cooked. Do not mix eggs. Let eggs cook standing still so they can somewhat solidify with rest of ingredients. Should take just a few minutes to cook.

Step 2: Make rice bowls

  1. Get a bowl of rice and top with the chicken, eggs, and sauce
  2. Spoon juice from the pan all over to add more flavor to the chicken and rice
  3. Garnish with more green onions


Crispy Rice With Spicy Tuna

One of my favorite appetizers!

INGREDIENTS

Makes approx. 24 pieces

  • 1 lb fresh sushi-grade ahi tuna
  • 2 tbs Sriracha sauce
  • 1 tbs sesame oil
  • 1 tsp hot chili oil
  • 1/4 cup mayonnaise
  • 1/2 cup chopped green onion
  • soy sauce
  • unagi sauce
  • 3 cups freshly cooked Japanese white rice (short or medium grain)

SPECIAL TOOLS: Japanese rice mold Link to product

INSTRUCTIONS

Step 1: Prepare the spicy tuna mixture

  1. Roughly chop the tuna
  2. Use a food processor to chop the tuna into a soft consistency. (You can also do by hand if you don't have a food processor)
  3. Combine the tuna, Sriracha sauce, sesame oil, hot chili oil and mayo and mix it well
  4. Refrigerate until ready to use

Step 2: Make the crispy rice

  1. Form the rice into rectangle shapes using the rice mold Link to product
  2. Be sure to pack it tightly so they don't fall apart
  3. Cook the pieces in batches depending on your pan size. You don't want to overcrowd the pan or they the pieces won't crisp nicely.
  4. Gently cook the pieces in a pan over medium heat with a dash of sesame oil
  5. When the rice starts to crisp, lightly brush all sides with soy sauce (Don't overdo it or the pieces will fall apart from the moisture)
  6. Cook for another 2-3 minutes or until all the pieces are browned
  7. Remove from the heat
  8. Repeat this process for as many pieces as you need.

Step 3: Assemble them

  1. Use small spoon to top each rectangle of rice with the spicy tuna mixture
  2. Brush the top with unagi sauce
  3. Garnish with green onions


Kimchi Fried Rice

Easy and satisfying!

INGREDIENTS

SERVES 2

  • 3 tablespoons extra-virgin olive oil
  • 3/4 cup chopped yellow onion
  • 3 garlic cloves, finely chopped
  • Kosher salt
  • 1 1/2 cups kimchi, chopped
  • 3 teaspoon soy sauce
  • 3 cups cooked short or medium grain white rice
  • 3 scallions, chopped
  • 3 tsp Korean chili sauce (adjust amount to your taste) Use your favorite one. I use this.
  • 2 eggs ( I like jumbo  size)
  • 1 tbs butter

INSTRUCTIONS

Step 1: Start by cooking the eggs so you have them ready once the rice is done. You can cook the eggs however you like but this if my fool proof method for making perfect no-hassle sunny side up eggs.

  1. Preheat your oven to 400 degrees
  2. Preheat your oven-safe non-stick pan in the oven for 5 minutes
  3. Once the pan is preheated, take it out and add the butter and 2 eggs
  4. Put pan back in the oven and let the eggs cook for 3-6 minutes depending on your oven

Step 2: Make the kimchi fried rice

  1. Heat 3 tablespoons of olive oil in a large nonstick skillet over medium heat
  2. Add the onions, garlic and a pinch of salt
  3. Cook and stir until the onions begin to soften and just begin to brown, about 10 minutes
  4. Turn the heat to high and add the kimchi and cook for 2 or 3 minutes
  5. Next, add the soy sauce and stir
  6. Once the kimchi starts to crisp, add in the rice and stir until mixed well
  7. Then add in the Korean chili sauce and mix well
  8. Cook the rice until it is hot and to your desired crispiness
  9. Then let it sit for a minute or 2 to develop a crisp crust on the bottom (optional)
  10. Once it is ready, top it with the eggs and green onions


Cold Udon Noodle Salad

A crowd favorite!

INGREDIENTS

  • 1 package dry udon noodles 500g (17-18oz)

  • 1/4 cup sugar

  • 1/2 tsp pepper

  • 1/4 tsp japanese chili pepper (amount to taste) Link to product

  • 1/2 cup vegetable oil

  • 1/3 cup sesame oil

  • 1/4 cup soy sauce

  • 5 tbs seasoned rice vinegar

  • 1 cup chopped green onion (amount to taste)

  • toasted sesame seeds (amount to taste)

  • 1 tsp aji-no-moto msg (optional but highly recommended for maximum flavor)

INSTRUCTIONS

Step 1: You can do this step the day before serving

  1. Boil noodles according to the package instructions 

  2. Rinse and drain noodles in cold water

  3. Cover and refrigerate noodles for at least 2 hours to get them nice and cold

Step 2:

  1. Whisk together the rest of the ingredients to make the dressing

  2. You can refrigerate the dressing until it is ready to use

Step 3:

  1. Gently mix together the noodles and dressing

  2. If the noodles seem stuck together, just work the dressing into the noodles and loosen them up.

  3. Add the toasted sesame seeds and green onion (save some green onion for garnish on top.

  4. Garnish the top with more sesame seeds and green onion


Deviled Eggs

A CLASSIC CROWD FAVORITE

This is my version of deviled eggs which is simple and classic.

PRINT RECIPE

INGREDIENTS

  • 6 hard-cooked eggs, peeled and halved

  • mayonnaise

  • 1/4 tsp dry mustard

  • salt to taste

  • 1/8 tsp pepper

  • smoked paprika

INSTRUCTIONS

  1. Remove egg yolks and mash with fork.

  2. Add mayonnaise and mix until it is a consistency like a thick guacamole. Then add dry mustard, salt and pepper; mix well. I use very little salt if any because the mayonnaise already has salt in it.

  3. Fill egg white halves with yolk mixture. You can cut off the corner tip of a big ziplock bag to use as a piping bag to fill the eggs.

  4. Sprinke the tops with the paprika. I usually pour some out in a small dish to make it easier to grab with my fingers.

Makes 12 halves

Crispy Curry Roasted Chicken

This is one of my go-to chicken dishes because it is easy, tasty and always comes out perfect.

This is a modified version of Ina Garten's recipe for "Crispy Mustard-Roasted Chicken." I put a twist on it by adding curry powder and cream of sherry which kicks up the flavor to the max. All you need to do is coat the chicken with a Dijon mustard and cream of sherry mixture and then cover the top side with Panko crumbs to add a zesty crunch.


PRINT RECIPE

INGREDIENTS

  • 4 garlic cloves
  • 1 tablespoon curry powder
  • Kosher salt and freshly ground black pepper
  • 2 cups Panko (Japanese bread flakes)
  • 1 tablespoon grated lemon zest (2 lemons)
  • 2 tablespoons good olive oil
  • 1/2 cup Dijon mustard (I use Grey Poupon)
  • 1/2 cup cream of sherry wine (or any other dry white wine you like)
  • 8 bone-in chicken thighs with the skin on

INSTRUCTIONS

  1. Preheat oven to 350 degrees.
  2. Add garlic, curry powder, 2 teaspoons salt and 1 teaspoon pepper into food processor fitted with steel blade and process until garlic is finely minced. Add Panko, lemon zest, olive oil and butter and pulse a few times to moisten the Panko. Pour mixture onto a large plate. In a shallow bowl, whisk together the mustard and wine.
  3. Pat the chicken dry with paper towels and sprinkle each side generously with salt and pepper. Dip each piece in the mustard mixture to coat on all sides and then place skin-side down only into the crumb mixture, pressing gently to make the crumbs adhere. Place the chicken on a sheet pan crumb-side up. Press the remaining crumbs on the chicken pieces.
  4. Bake the chicken for 40 minutes. Then raise the temperature to 400 degrees and bake for another 10 minutes, until the crumbs are browned and the chicken is cooked through. Serve hot, warm, or at room temperature.